

How to Grow and Care for Lithops (Living Stones)

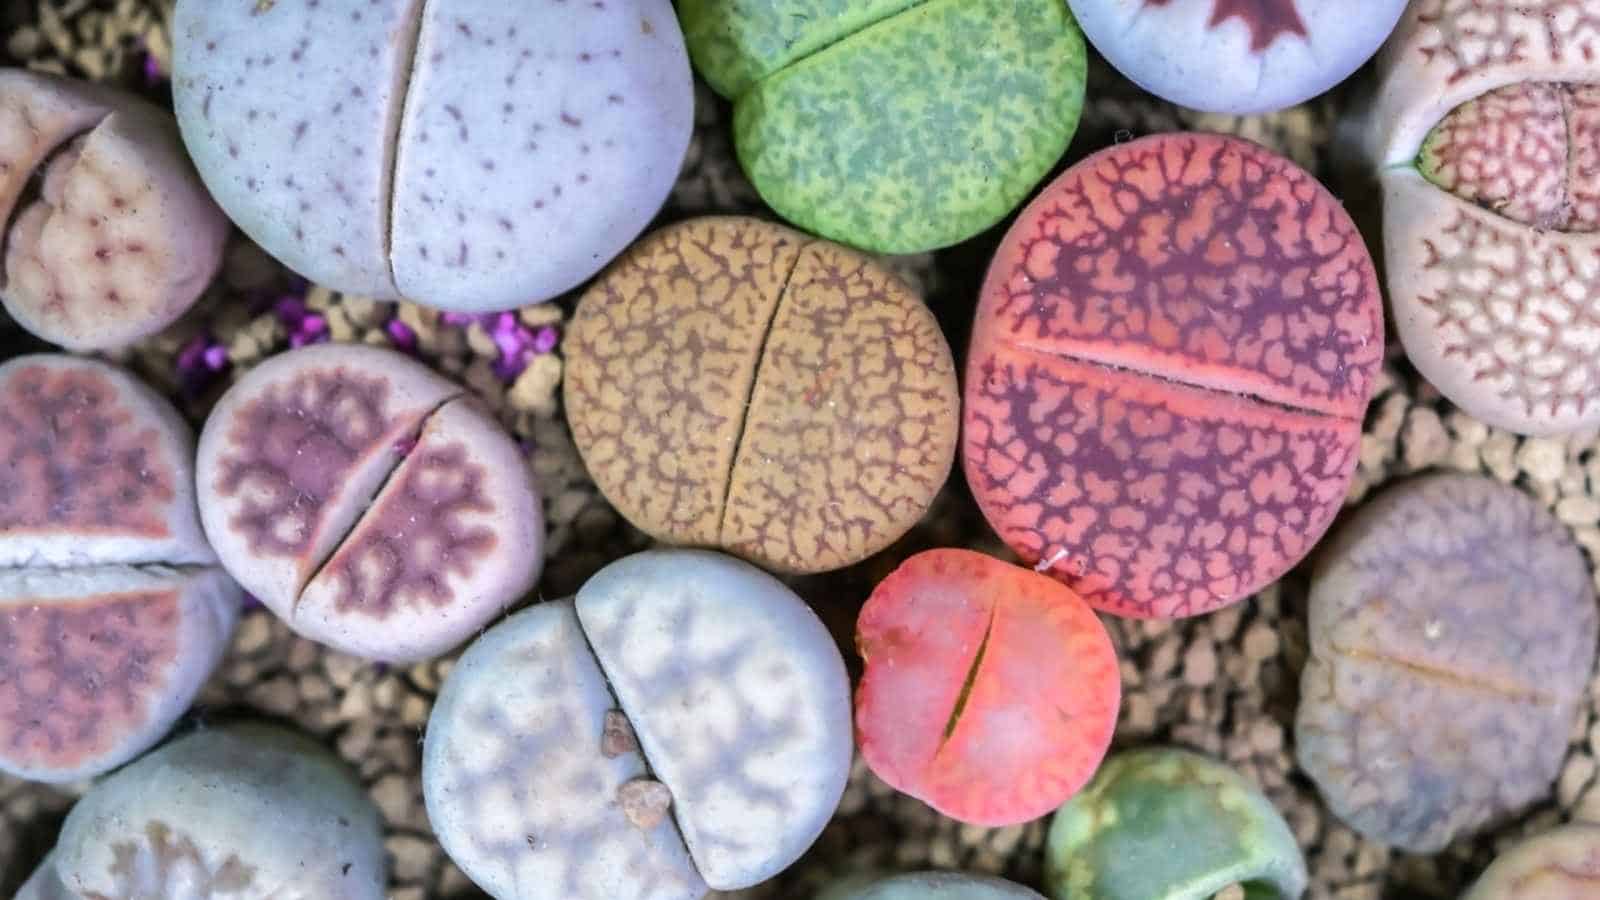
Lithops, also known as living stones, are unique succulents native to Southern Africa. These slow-growing plants are famous for their stone-like appearance, which serves as a quirky accent to any indoor plant collection.
Their unusual form, coupled with their colorful pebble-like outer leaves, can easily fool the untrained eye into thinking they are just part of the surroundings.
These plants are perfect for those who have a penchant for cactuses and other drought-resistant species.
They have a taproot system that allows them to withstand long periods of thirst, absorbing whatever little water and nutrients are available from the well-drained soil mix they thrive in.
This characteristic makes them ideal for growers who prefer low-maintenance plants.
Lithops are not only hardy but also bloom beautiful white flowers, known as lithops flowers, in the early winter. However, these flowers only appear when the plant is mature and under the right conditions.
Despite their tough exterior, Lithops require careful attention to watering, as too much water can be toxic to them. They prefer partial shade over direct sunlight, and new growth often comes at the expense of old leaves.
Nevertheless, their unique charm and resilience make them a fascinating addition to any garden and as a master gardener I’ll share everything you need to know to grow them in this complete guide.

Botanical Name: Lithops spp.
Common Name: Living stones, pebble plants
Family: Aizoaceae
Plant Type: Succulent, perennial
Hardiness Zones: 10–11 (USDA)
Sun Exposure: Full
Soil Type: Sandy, well-drained
Soil pH: Acidic, neutral, alkaline
Bloom Time: Fall, winter
Flower Color: White, yellow, orange
Native Area: Africa
Lithops Plant Care
Lithops are slow-growing plants and require a well-drained soil mix, ideally containing sand and gritty materials to mimic their natural surroundings.
Place your pot in a location with partial shade, as direct sunlight may scorch the new leaves. Lithops have a taproot that stores water, so they only need a little water, particularly in early winter when new growth is forming.

Overwatering can lead to root rot, so ensure your pot has a drainage hole to remove excess water. These plants are non-toxic, making them a safe addition to your indoor plant collection if you have pets.
Light
Lithops grow best in direct sunlight, mimicking their natural surroundings in southern Africa. They can, however, tolerate partial shade, especially during the harsh summer months.
Too much shade can result in elongated and weak new growth, which is not desirable for these unique succulents.
During the early winter months, it’s crucial to provide them with as much light as possible to encourage the germination of new leaves. Indoor plant collection growers should place them near a south-facing window to provide enough light.
Soil
A soil mix of sand and gritty materials is ideal, as it mimics their natural surroundings.
These unique succulents also prefer soil with low nitrogen content, as too many nutrients can lead to an overgrowth of leaves and hinder the stone-like appearance.

The soil surface should be topped with colorful pebbles, adding a quirky accent to your indoor plant collection. Lastly, ensure your pot has a drainage hole to let out any excess water, as this can be detrimental to the health of these slow-growing plants.
Water
These slow-growing plants have a deep taproot system that absorbs moisture from the soil surface, and they store excess water in their thick leaf pairs, so they require much less water than other indoor plant collection members.
In fact, overwatering can lead to root rot, a common problem among novice lithops growers. It’s best to water these plants sparingly, allowing the soil mix to dry out completely between waterings.
During their early winter dormancy period, refrain from watering altogether to prevent the old leaves from absorbing too much water, which can interfere with the emergence of new growth.
Temperature and Humidity
Lithops prefer temperatures between 65°F and 80°F but can tolerate temperatures as low as 50°F in early winter. While they can withstand a certain level of humidity, too much water can lead to root rot.
Indoor growers should also ensure that their living stones are kept in an environment with low humidity to mimic their native surroundings.
Fertilizer
Lithops thrive best in a low-nitrogen soil mix, which mimics their natural gritty surroundings. Excessive nutrients can lead to rapid new growth, which is not ideal for these slow-growing plants.
The best time to fertilize is in early winter when new leaves are forming. Always remember, it is better to under-fertilize these unique succulents as they are adapted to thrive in nutrient-poor conditions.

Pruning
Living stones require minimal pruning. The old leaves naturally wither away as new growth emerges, making the need for pruning almost non-existent.
However, if there is a noticeable excess of old leaves that haven’t self-pruned, gentle removal may be necessary to prevent the risk of root rot from too much water retention.
It’s crucial to remember that these succulents have a taproot system that is sensitive to disturbance, so any pruning should be done with utmost care.
The goal is to maintain the health of the plant while preserving its quirky accent in your indoor plant collection.
Overwintering
During the early winter months, lithops require very little water. They enter a period of dormancy where old leaves are absorbed to make way for new growth.
It’s important to ensure that excess water is not left in the pot, as this can lead to root rot. The pot should have a drainage hole and be filled with a well-drained soil mix, ideally containing gritty materials like sand to mimic their natural, arid surroundings.
Keeping living stones in partial shade rather than direct sunlight during these months will also help prevent moisture loss.
Types of Lithops
- Lithops Julii: Lithops Julii is a unique succulent that adds a quirky accent to any indoor plant collection. Known as living stones, they have a stone-like appearance that helps them blend in with their surroundings. The plant has a pair of leaf pairs that split open to reveal new growth.

- Lithops Gracilidelineata: The Lithops Gracilidelineata is a slow-growing plant from South Africa, known for its colorful pebbled surface. This species is perfect for growers who want to add a touch of the exotic to their garden without the thirst of a typical cactus.

- Lithops Lesliei: Lithops Lesliei, another South African native, is a popular choice among succulent lovers. Its outer leaves give way to new leaves, a fascinating process to witness. The plant requires little water and thrives in partial shade rather than direct sunlight.

- Lithops Marmorata: Lithops Marmorata is a unique variety that mimics the appearance of marble, hence its name. Despite its exotic origins, it’s a beloved plant among African children for its stunning appearance.

How to Plant Lithops From Seed
Step 1: Prepare the Pot and Soil
Firstly, select a pot with a drainage hole to prevent the accumulation of excess water which can lead to root rot.
You can create a suitable soil mix by combining equal parts of sand, potting soil, and gritty materials such as perlite or pumice. This mixture will mimic the lithops’ natural surroundings and ensure proper drainage.
Step 2: Plant the Seeds
Spread the lithops seeds evenly over the soil surface. Cover them lightly with a thin layer of sand or soil. This will aid in their germination process. Make sure not to bury the seeds too deep as they need light to germinate.

Step 3: Water the Seeds
After planting, give the pot a little water. Be careful not to use too much water as lithops are prone to root rot if they sit in waterlogged soil. They are slow-growing plants that have adapted to survive in arid conditions with little rainfall.
Step 4: Position the Pot
Place the pot in a location that receives partial shade or indirect sunlight. While lithops can tolerate direct sunlight, seedlings are more sensitive and can get scorched. As the plants mature, they can gradually be introduced to more sunlight.
How to Propagate Lithops
Step 1: Collect and Germinate Seeds
Lithops propagate primarily through seeds. These tiny gems can be collected from the white flowers that bloom in early winter.
The seeds are then placed on a well-drained soil mix, preferably a blend of sand and gritty materials. Keep the soil surface moist but not drenched, as too much water can lead to root rot.
Step 2: Care for the Seedlings
After germination, new growth will appear in the form of tiny leaf pairs. At this stage, it’s crucial to provide the seedlings with a low-nitrogen diet.
This nutrient is essential for their development but too much can be toxic. Water the seedlings sparingly, as lithops have a taproot that stores water for times of thirst.
Overwatering can cause the old leaves to retain excess water, inhibiting the growth of new leaves.

Step 3: Transplant the Seedlings
Once the seedlings have developed a strong root system, they are ready to be transplanted. Choose a pot with a drainage hole to prevent waterlogging.
Fill the pot with a well-drained soil mix and plant the lithops. Remember, these unique succulents are slow-growing plants native to the harsh climates of southern Africa, so they require little water and partial shade rather than direct sunlight.
How to Pot or Repot
Step 1: Select the Right Pot
When it comes to potting or repotting lithops the first step involves selecting the right pot. These slow-growing plants prefer shallow pots with a wide diameter.
The pot should have a drainage hole to allow excess water to escape, preventing root rot. A pot with a depth of about 3-5 inches is ideal.
Step 2: Prepare the Soil Mix
Lithops thrive in well-drained soil that mimics their natural desert surroundings. A soil mix that contains sand and other gritty materials such as perlite or pumice is perfect.
Some growers also add a bit of compost for added nutrients, but remember that lithops require low nitrogen levels. The soil surface can be decorated with colorful pebbles to enhance their stone-like appearance.
Step 3: Pot Them

After preparing the pot and soil mix, it’s time to pot the lithops. Gently place the plant in the pot, ensuring the leaf pairs are level with or slightly above the soil surface. This is crucial as new leaves emerge from the fissure between the leaf pairs.
Once positioned, fill the space around the plant with the soil mix, taking care not to damage the old leaves or new growth.
Common Pests and Plant Diseases
Root Rot

Root rot is a common disease for lithops, often caused by excess water and poor drainage. This disease is fatal and can quickly affect the taproot, causing the plant to wilt and eventually die.
Lithops require a well-drained soil mix with gritty materials like sand to prevent this. A pot with a drainage hole is essential to allow any excess water to escape.
Mealybugs

Mealybugs are small, white pests that can infest lithops, especially when grown as part of an indoor plant collection. They suck the sap from the plant, causing new growth to become stunted and old leaves to yellow and drop off.
Mealybugs thrive in conditions with much water and poor air circulation. To prevent them, water lithops sparingly, as these unique succulents have a low thirst and prefer their surroundings dry.
Fungal Diseases
Fungal diseases can also affect lithops, usually as a result of overwatering or poor air circulation. These diseases can cause the outer leaves to become discolored and the new leaves to become distorted.
It’s important to keep the soil surface dry and provide plenty of air circulation around your lithops. Avoid watering in the early winter when the plant is in its dormant stage.
Common Plant Problems and Solutions
Brown Tips on Leaves
Brown tips on your lithops may be a sign of excess water. To solve this, ensure your pot has a proper drainage hole and only water when the soil surface is completely dry.
Yellowing Leaves
Yellowing of the outer leaves is a common issue faced by lithops growers. This is often due to the plant being exposed to direct sunlight for long periods.
While these plants thrive in bright light, they prefer partial shade to protect them from the intense midday sun. Adjusting their surroundings or moving them to a location with filtered light can help restore their health.
No New Growth
Lithops are known for their unique growth pattern, where new leaves emerge from a fissure in the old leaves. If you notice a lack of new growth, it may be due to a deficiency in nutrients.
These plants require a low-nitrogen soil mix for optimal growth. Consider adding a slow-release fertilizer to the soil to boost nutrient levels.
Failure to Flower

Lithops flowers, often white or yellow, usually bloom in early winter. If your lithops fail to produce these flowers, they may not be getting enough water.
Despite their low water requirements, they do require slightly more moisture during the germination period. Water them a bit more frequently during this time, but be careful not to overwater.
Other Guides from Planet Natural:
Irish Moss: A Guide From Growing to Propagation
Lenten Rose: How to Grow and Care for Helleborus x Hybridus

Melissa Pino is a biologist, master gardener, and regular contributor for Planet Natural. Melissa’s work focuses on promoting environmentally-friendly practices, helping people create healthy gardens and finding ways to achieve overall health and wellness.
